How to Use the Spectra S1 and S2: Powerful Settings to Maximize Your Breast Milk Output
Hi mama! Welcome to the wonderful world of pumping! If you’re reading this, it’s because you are considering or have chosen the Spectra S1 or S2 as THE breast pump. And you made a great choice and one of my breastfeeding essentials.
Now, at first glance, these Spectra models may seem overwhelming. There are so many buttons with different icons and numbers on the screen. It might as well be hieroglyphics, am I right?
This blog post will show you how to use the Spectra S1 or S2. It will also help you choose the settings that are comfortable for you and help maximize your output. So grab your S1 or S2 breast pump and let’s get started!
This post contains affiliate links, which means I receive a small commission, at no extra cost to you, if you make a purchase using this link. Please see my disclosure for more details.
How are the Spectra S1 or S2 different?
Before we begin with the nitty-gritty of breast pump settings, let’s go over the difference between the Spectra S1 and Spectra S2.
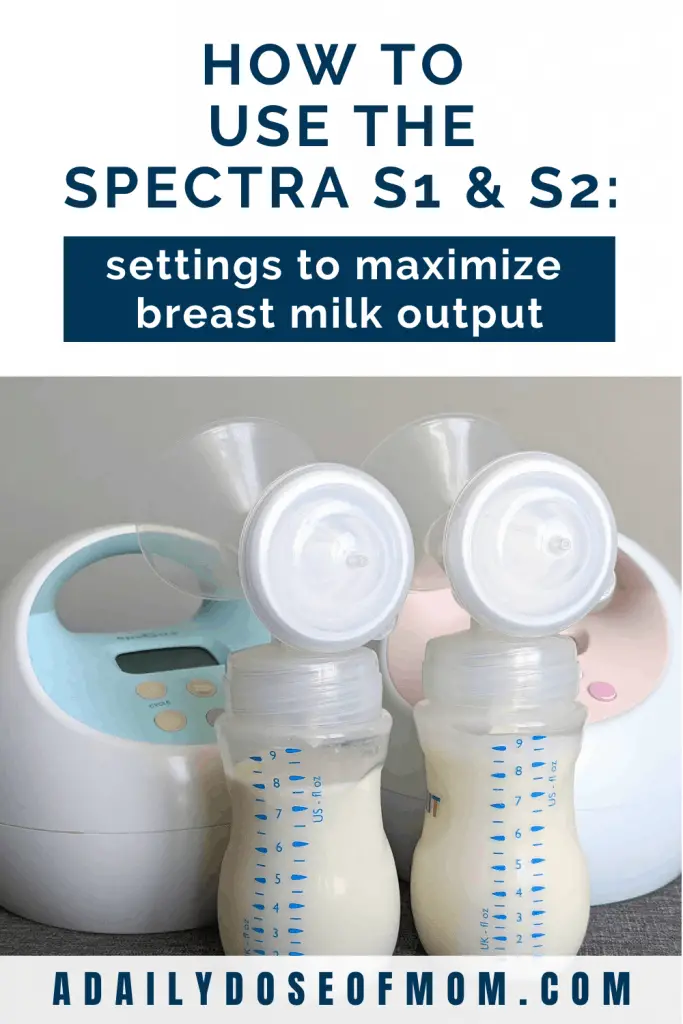
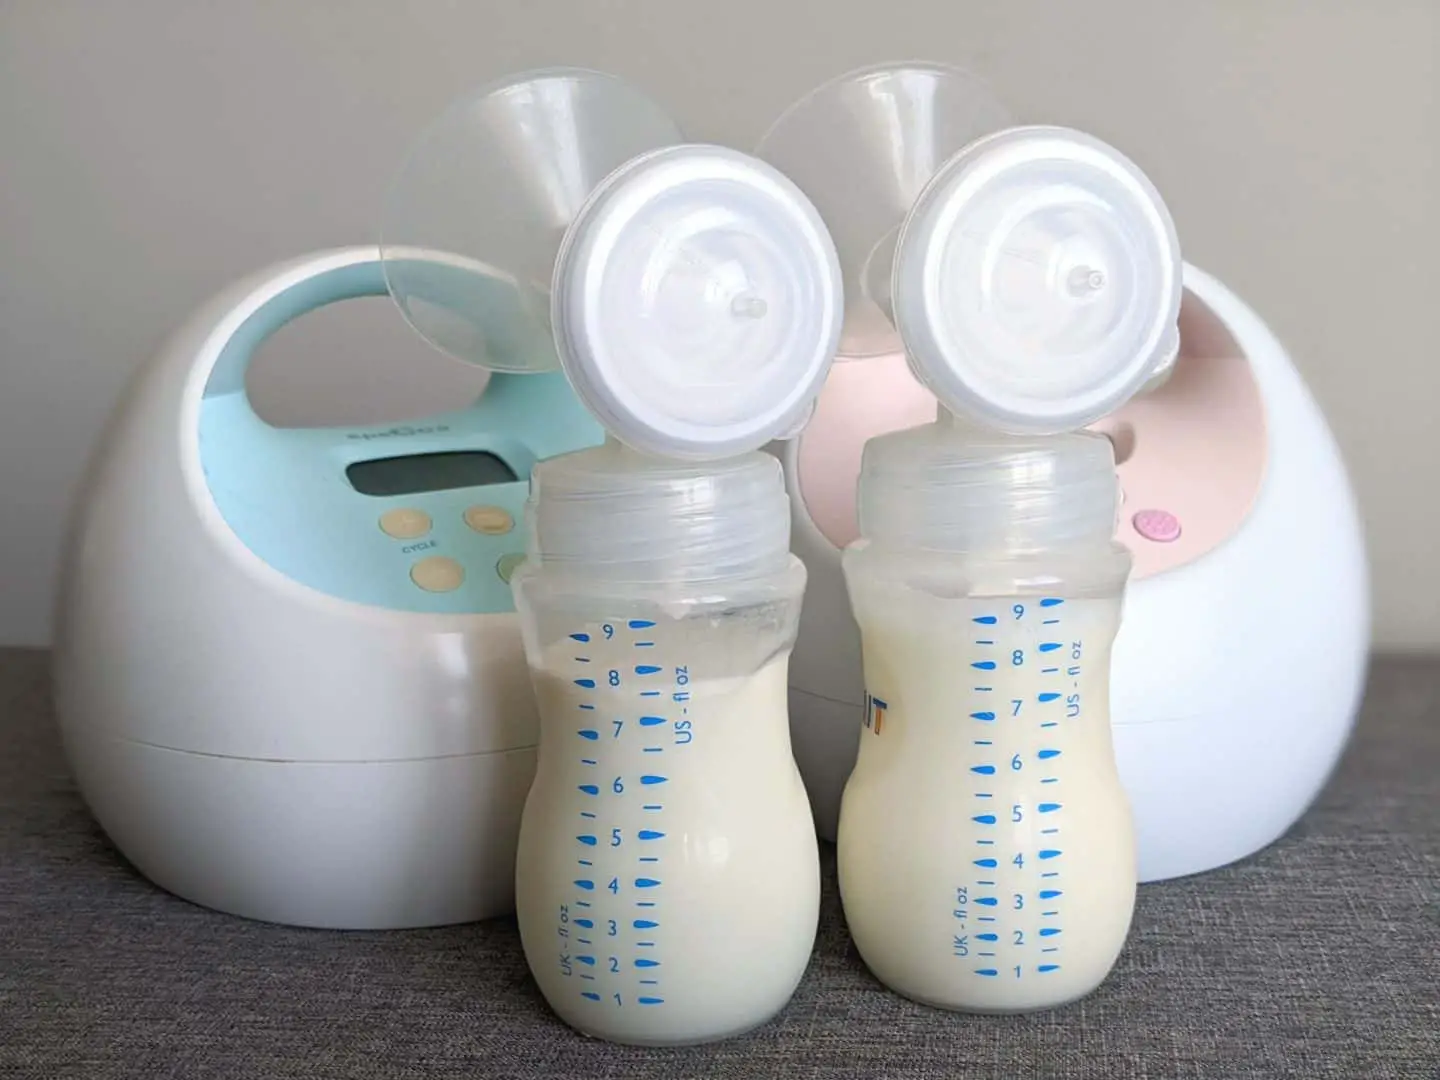
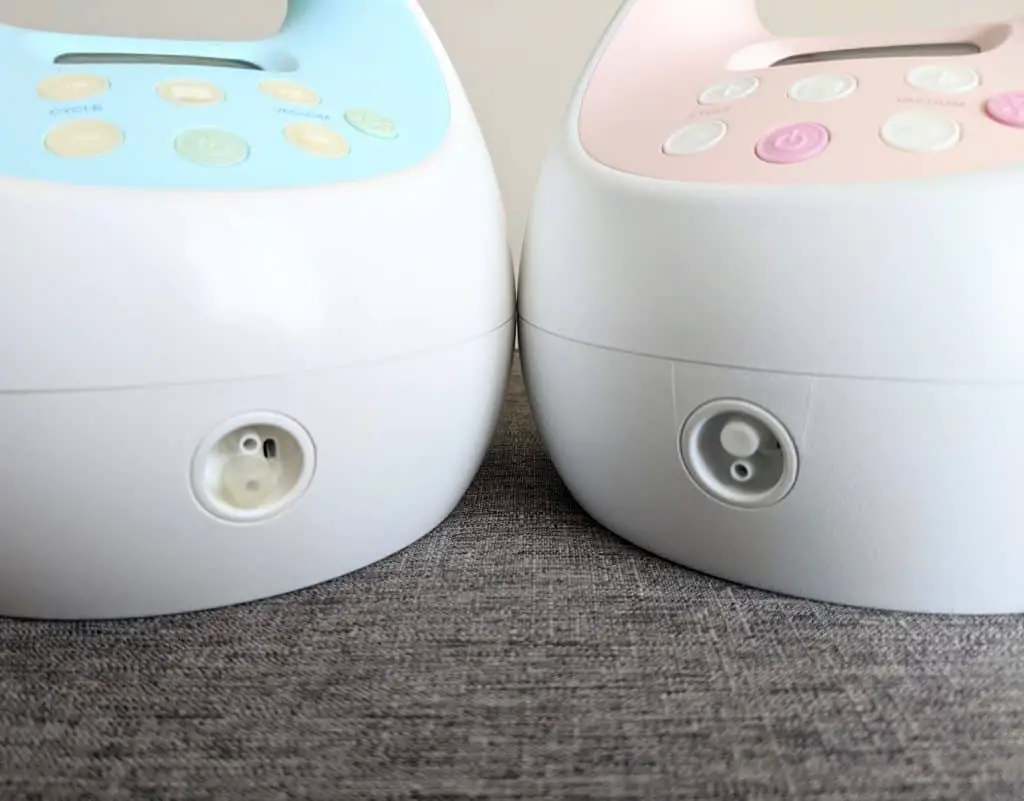
Essentially, they are the same pump. So you’ll get the power of a hospital-grade pump from either. The main difference is that the S1 (light blue) has a rechargeable battery and the S2 (light pink) does not. Because of this, the S1 is a little more expensive.
You can’t go wrong with either pump, especially since you can make the S2 portable with a battery pack! The Spectra S1 or S2 pump is so quiet and the nightlight makes it perfect to add to your breastfeeding station!
This blog post goes into detail on how the S1 and S2 are similar and how they are different.
Parts of Spectra S1 and S2
Now we know that the Spectra S1 and S2 are almost the same pump minus the rechargeable battery. Let’s go over the parts.
1. Flange
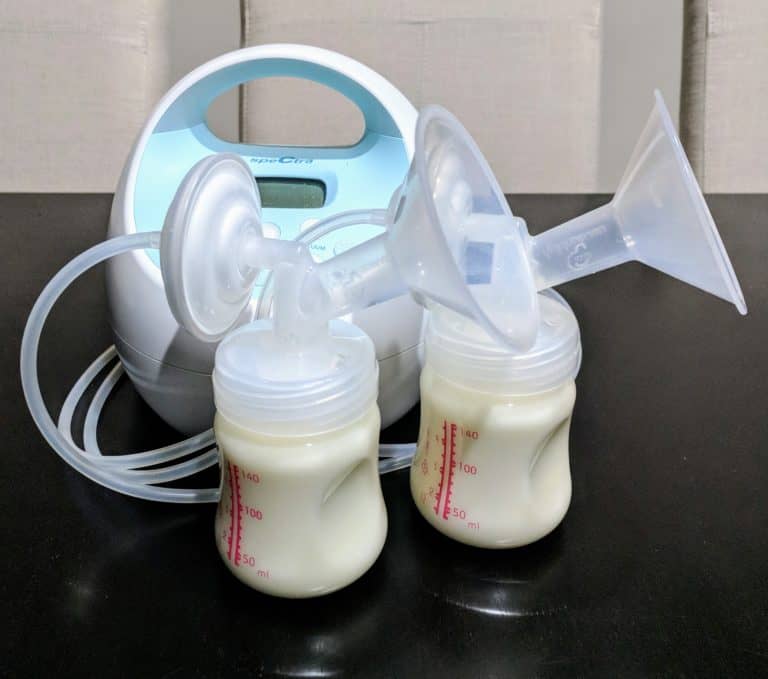
A flange is also known as a breast shield. It is a plastic shield that fits over your nipple. The flange forms a seal and vacuum and extracts milk by drawing your nipple into the funnel.
When you receive your Spectra S1 or S2, it will come with two 24 mm and two 28 mm flanges. These standard flange sizes may not be the right ones for you! You must find the correct flange size before using your new breast pump. Using an incorrect size is uncomfortable. It will also lead to inefficient pumping and lower output.
There are some moms that have elastic nipples that cause pain when pumping as well as low breast milk supply. If you think this is the case, this post will suggest 5 useful solutions to help with this. This may include using a silicone flange or insert.
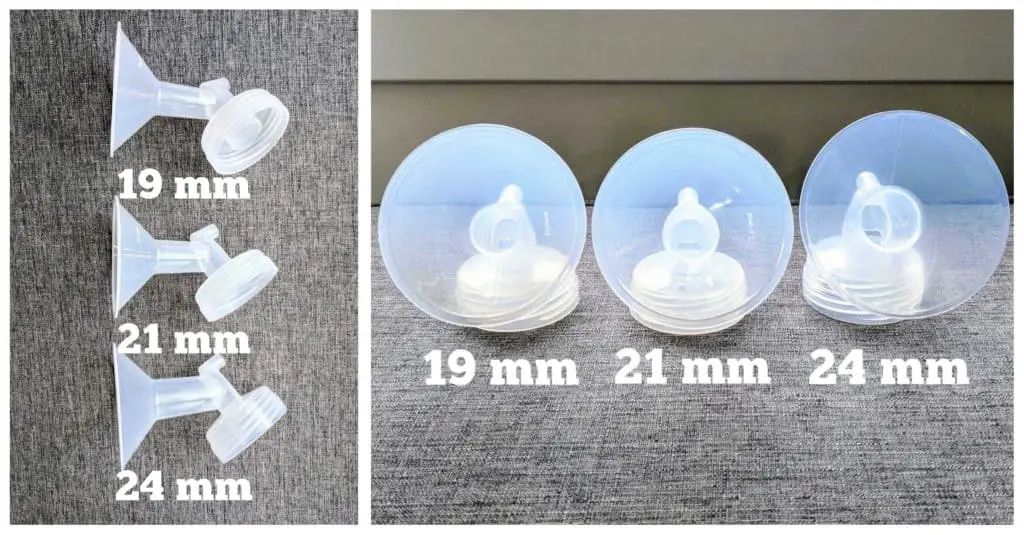
There are many resources on how to find the correct flange size. You can read this post or click the links below:
Pro Tip
Find your correct flange size for a more comfortable and efficient pumping session.
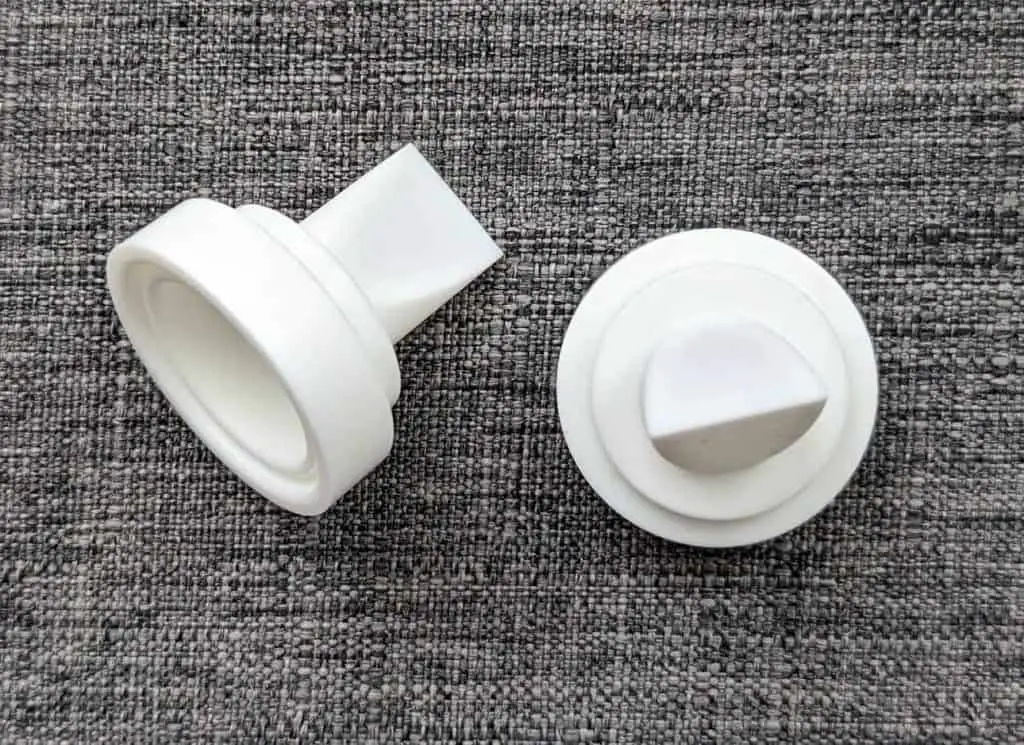
2. Duckbill Valve
A duckbill valve increases suction and prevents backflow contamination.
3. Bottle
A bottle will screw into the flange and will collect milk extracted from a pumping session.
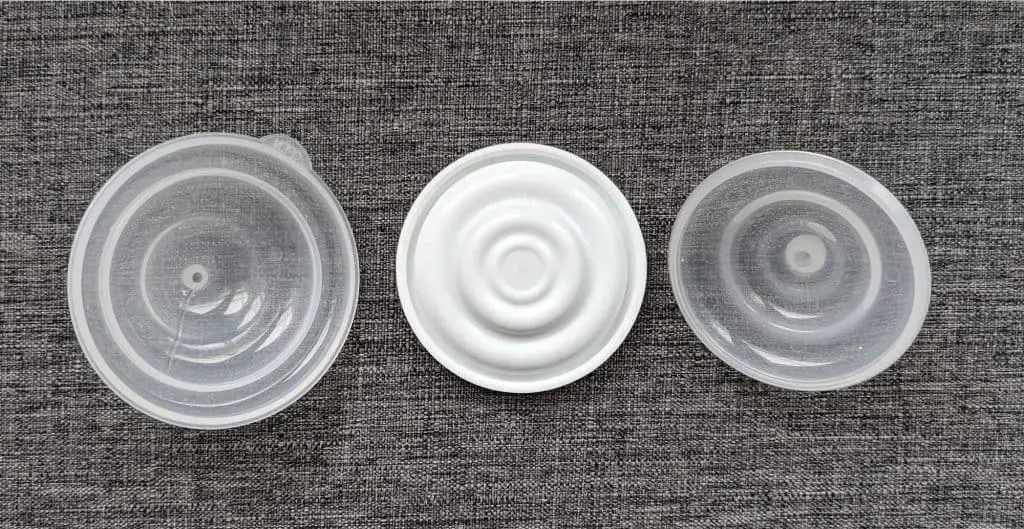
4. Backflow Protector
The backflow protector is vital in making the Spectra S1 and S2 a closed pumping system. It is a physical barrier that ensures that any pumped milk is protected from outside contamination. It also prevents milk from entering the pump motor.
The backflow protector has three components: a silicone diaphragm, a small case, and a large case.
5. Tubing
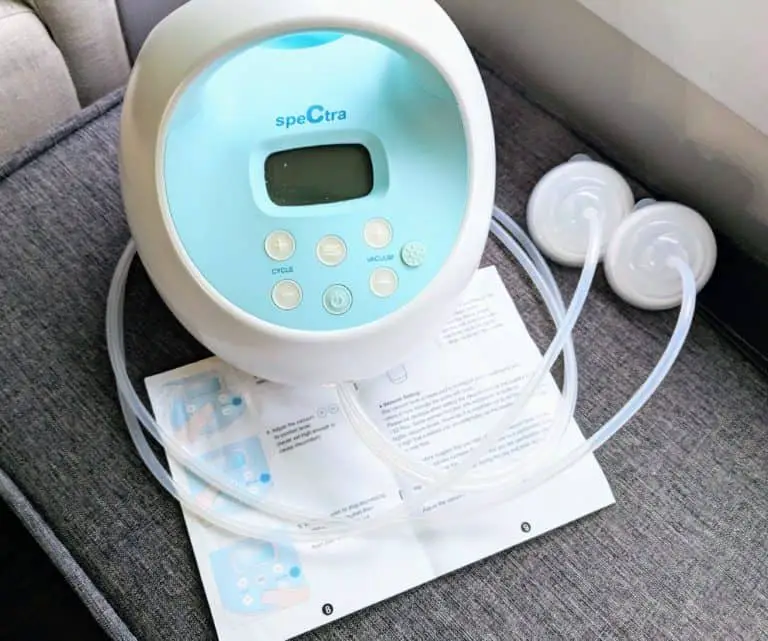
Tubing attaches the Spectra S1 or S2 pump to the flange via the backflow protector.
How to Assemble Spectra S1 or S2 parts
When you first receive your S1 or S2 pump, it will come disassembled. Here are the steps on assembling the parts:
- Attach one end of the tubing to the pump ports. You can toggle between single or double pumping as seen in Tips and Tricks below.
- Assemble backflow protector: Fit the diaphragm over the edge of the small case. Snap on the large case so that it fits over the small case.
- Attach the other end of the tubing to the connector on the small case.
- Attach the flange to the connector on the large case.
- Insert the duckbill valve onto the bottom part of the flange.
- Screw the wide-neck bottle onto the flange.

Spectra S1 and S2 Buttons
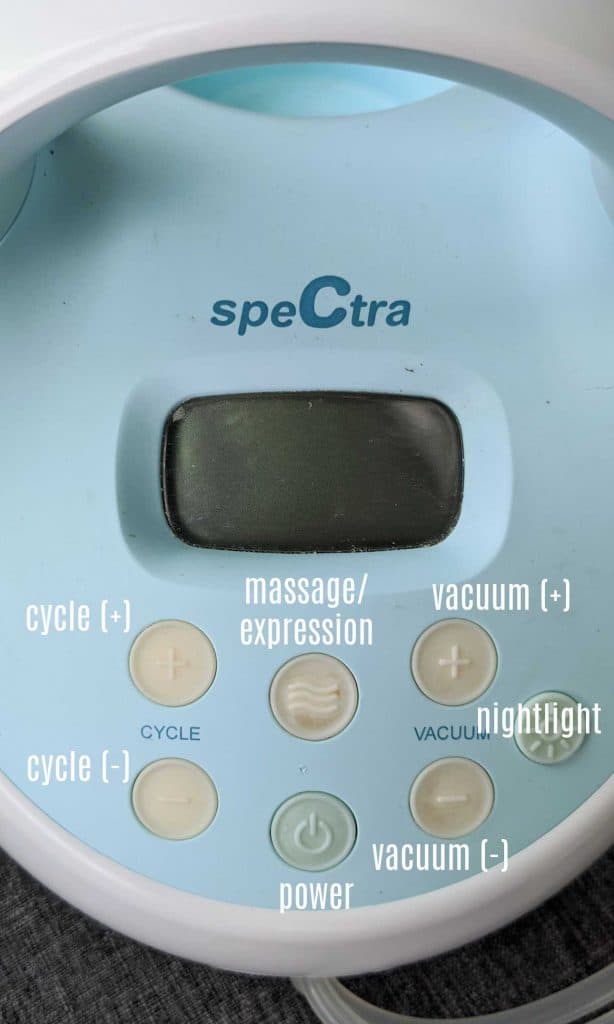
Let’s go over the buttons on an S1 or S2 and what their function is:
- Power Button – turns breast pump on and off.
- Massage/Expression Button – switches from massage (let-down) mode to milk expression mode. The wavy lines indicate let-down mode.
- Cycle Button (+/-) – the number of suck-and-release cycles per minute (CPM). It is adjustable between 38 and 54 CPM in Expression Mode and locked at 70 CPM in Massage Mode.
- Vacuum Button (+/-) – the strength of the suction. It is adjustable between 1 and 12 in the Expression Mode and 1 and 5 in the Massage Mode. The higher the number indicates the stronger the suction.
- Night Light Button – provides two brightness levels.
Spectra S1 and S2 Settings To Maximize Output
The benefit of the Spectra S1 or S2 is the ability to customize the settings to what is most comfortable to you. This is different from other breast pumps that function only at one level once turned on.
The settings below mimic how a baby would nurse, so it will help maximize your pumping session. When a baby first starts to nurse, they suckle very rapidly to stimulate a let-down. Once that occurs, the baby changes to long and slow sucking. Then as milk slows down, the baby may use a stronger and slow suck to draw out more milk. Finally, as the breast milk stops, the baby switches back to fast suckling to get yet another let-down. And the cycle repeats itself.
You can imitate this natural suckling method with a Spectra S1 or S2!
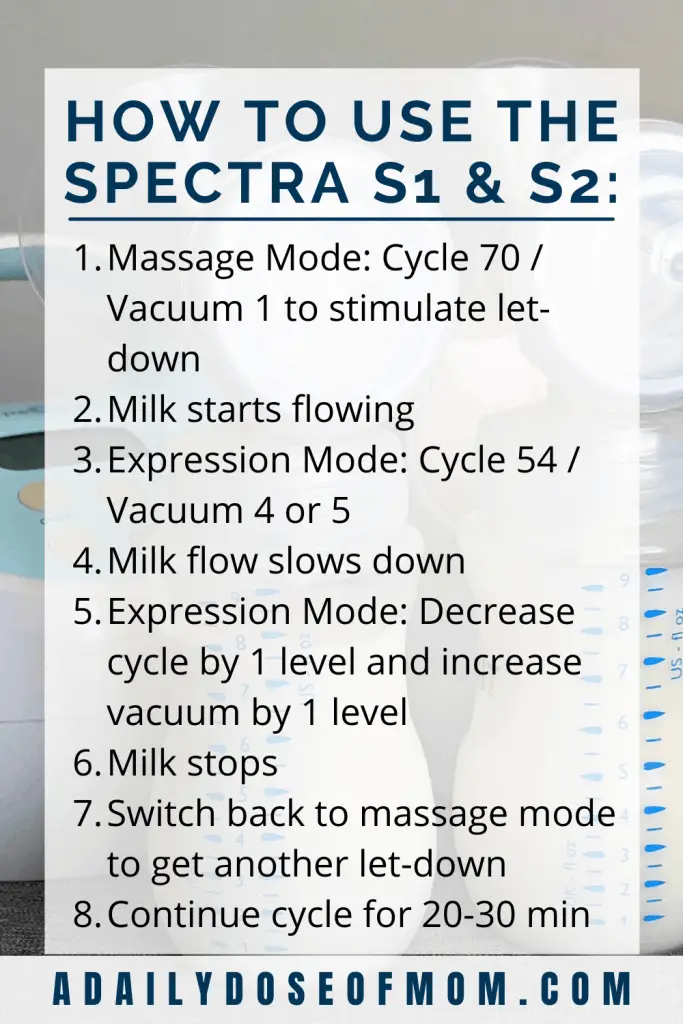
- When you turn on the pump, it will start in expression mode. Press wavy lines to switch to massage mode. Start with Cycle 70 / Vacuum 1 mode to stimulate a let-down and milk starts flowing.
- Once the milk starts coming out, switch back to expression mode (press wavy lines) with a cycle of 54 and a vacuum level of 4 or 5.
- As your milk starts to slow down, decrease the cycle speed by one level and increase the suction level by one.
- Once your milk completely stops, switch back to massage mode to stimulate another let-down.

Spectra S1 and S2: Massage Mode (Wavy lines are showing) 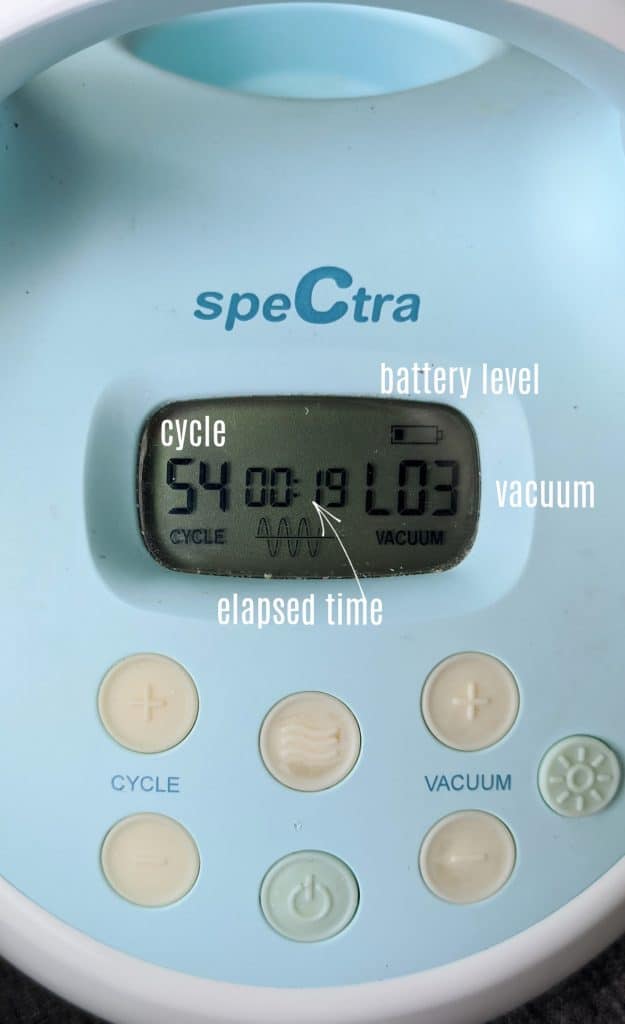
Spectra S1 and S2: Expression Mode (No wavy lines)
The benefit of having multiple let-downs per pump session is that it removes more milk. The more milk that is removed, the more it signals your body to make more! Pretty soon, you may have a freezer stash going and you can start to donate any extra milk to babies in need. 😍
Another way to build a breast milk stash is using a silicone pump every time that baby nurses. This post goes into detail on how to build a stash just on maternity leave!
Spectra S1 and S2 Maintenance
Initial Sterilization
Before using the Spectra S1 or S2 for the first time, sterilize all the parts, minus the tubing.
- Place all other parts (flanges, bottles and lids, and the small and large cases of the backflow protector) in a pot large enough to fit them all.
- Fill the pot with enough water so that there is 4” of water above the parts when they are added.
- Put on the lid and bring water to a boil.
- Once the water starts boiling, turn off the heat, and place the parts into the pot.
- Remove parts after 3-5 minutes.
The silicone accessories, such as the duckbill valves and the backflow protector membranes, should not be exposed to high heat. Instead, they can be placed in boiling water for less than 2 minutes.
Cleaning
The maintenance of the Spectra S1 or S2 is pretty simple. Disassemble all parts that came into contact with the breast or breast milk. These parts are the flange, duckbill valve, and bottle. These parts can be hand-washed with warm soapy water and rinsed with hot water. They are also dishwasher safe but must be placed on the top rack. If using the dishwasher, heated dry should not be used.
After washing the pump parts, place them on a towel or drying rack to air dry completely.
The tubing does not need to be washed. But, the standard tubing that comes with the Spectra does like to pick up lint and other dust. See Tips and Tricks below to avoid this. You can clean the outside of the tubing with a damp towel.
For the actual Spectra pump, NEVER submerge it underwater. If the pump itself gets dirty, use a damp towel to wipe it clean.
Replacement of Pump Parts
As with any breast pump, regular use will need the replacement of the pump parts. The frequency of how often you need to replace the parts will depend on how often you pump. An exclusive pumper will have to replace parts more than a mom who pumps only once a day.
But, if you notice a sudden drop in your breast milk output, it doesn’t hurt to change out your pump parts. It’s a good idea to always have extra on hand. Especially when those duckbill valves always get lost in the sink drain.
Here is a general guide from Spectra’s website on when to change out the different Spectra pump parts:
- Duckbill valve – replace every 1-3 months. If you are an exclusive pumper, change the duckbill valve once a month. Otherwise, replace every 2 or 3 months. Duckbill valves can also get damaged easily from regular washing. Keep a few extra handy and replace them if you notice an issue with suction while pumping.
- Backflow protector diaphragm – replace every 3-6 months. The diaphragm can stretch and degrade with regular use. Using a torn or damaged diaphragm can allow moisture to seep into the pump motor. This causes mold and irreparable damage to your Spectra pump.
- Flange – replace every 6 months. Despite careful cleaning, residue can still build up in your flanges in those hard-to-reach places. Thus, Spectra recommends replacing your flanges every 6 months.
- Tubing – replace as needed. The backflow protector should prevent moisture from entering the tubing. But, if moisture were ever to find its way into the tubing, you will need to replace it. There is no way to sterilize and completely dry it. You may notice that the tubes slip off your backflow protector or pump easily. If this happens, the ends of the tubes are becoming stretched. To fix it, you can snip off the last inch on either side with a pair of scissors.
Tips and Tricks on using the Spectra S1 or S2
After having pumped over thousands of ounces of breast milk with my trusty Spectra S1 and talking with other Spectra mamas, I have gathered useful tips and tricks along the way.
Using Different Brands for Pump Parts
- Tubing – As mentioned above, the tubing that comes with the pump can pick up SO much lint, hair, and dust. Other pumping moms have mentioned that you can use different tubing, such as off-brand tubing or even aquarium tubing! Aquarium tubing for your Spectra! Who knew!
- Bottles – The Spectra bottles that come with the pump are not the greatest. The volume markings are difficult to read and start to rub off after many uses.
- Also, these bottles can become loose during a pumping session 😲. Can you imagine the heartbreak of pumping an entire bottle of breast milk, only for the bottle to unscrew and completely spill over your lap?! Yes, this has happened to me and I cried a literal river.
- Some mamas find that a 5 oz bottle is not enough to hold the milk from their pumping session. The Avent wide-mouth bottles fit the Spectra flange perfectly without needing an adaptor. The 9 oz size is great for those that pump a lot during each session. These Maymom bottles are also a great option!
- Other pump parts (flange, duckbill valves, backflow protector) – There are many options for pump parts that are not made by Spectra, so they are friendlier to the wallet. Please note that these parts are often made aftermarket. Honestly, I’ve used off-brand parts when it was time for a replacement and I’ve never had an issue.
Reset Your Settings
Your Spectra pump will remember the settings of your last pump when you turn it off. To save your nipples from much harm, decrease the settings back to your starting level and suction speed once you complete a pumping session.
Single or Double Pumping
The included air cap allows you to toggle between single or double pumping. Simply remove the air cap and attach tubing for double pumping. For single pumping, put the air cap back on, covering the port.
Single pumping is particularly useful if you have a slacker boob and you need to kick it into gear to match your overachiever boob.
How to check the number of hours pumped on a Spectra
Are you curious on how many hours you have spent pumping? Find how by doing the following sequence:
- Power on > Massage mode > Cycle + > Vacuum – > Cycle – > Vacuum + > Massage mode
Power Pumping
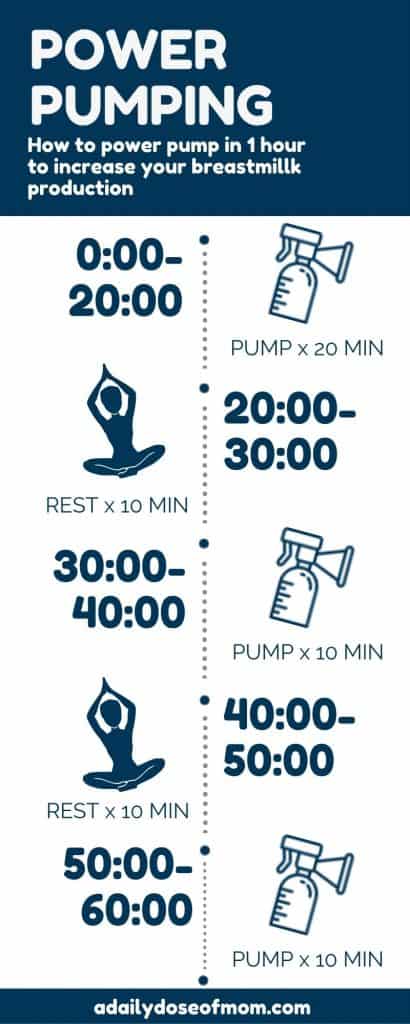
Power pumping is a way to signal to your body to increase breast milk production. It does this by mimicking cluster feeding that occurs when a baby goes through a growth spurt. This infographic shows you how to power pump in one hour!
More tips to maximize each pumping session
Check out this blog post on how to maximize each pump session in 7 effective ways!
Final thoughts on how to use the Spectra S1 or S2
That wasn’t so bad, was it? Yes, it may seem like a lot at first, but you’ll get the hang of it the more you pump. Eventually, you’ll be able to do an entire pump session in a sleep-deprived state (thanks, nightlight!) and it will become muscle memory.
Of course, if you have any issues or need troubleshooting, please reach out to a lactation consultant or Spectra Baby USA. Lactation consultants undergo many hours of training and education. They are truly experts on all forms of lactation: nursing and/or pumping.
If this guide on how to use a Spectra S1 or S2 was helpful, please let me know! I would also love to hear any tips or tricks you’ve encountered during your pumping journey!
Check out these other helpful articles about breast pumps!


