How to Attach Bows to a Cranial Helmet in 5 Minutes (Cute & Easy DIY)
Your baby girl just got her cranial helmet — and if you’re anything like I was, you might be feeling a mix of emotions. I remember being so nervous to take Lily out in public. I worried people would stare, or worse, judge us like something was “wrong” with her.
But here’s what I quickly learned: this helmet is helping her, and it doesn’t have to feel clinical or boring. In fact, it can be just as much a part of her personality as the outfits she wears every day.
That’s why I started decorating Lily’s helmet with bows — and honestly, it changed everything. Instead of people whispering, they’d stop us to say how cute she looked. Even better, Lily’s bows matched her outfits, so every day felt like a mini fashion show.
And the best part? Attaching bows to a cranial helmet is super easy, costs less than $10, and takes just 5 minutes. Let me show you exactly how to do it.
This post contains affiliate links, which means I receive a small commission, at no extra cost to you, if you make a purchase using this link. Please see my disclosure for more details.
The Helmet Decoration Dilemma
When Lily first got her DocBand, I felt torn. On one hand, I wanted her helmet to stay simple and clean. On the other, I couldn’t shake the worry that people would stare or judge — and I wanted her to feel just as adorable as she did without it.
That’s when the idea of bows clicked. If I could find a way to make them interchangeable, Lily’s helmet could match her outfits, make photos fun, and most importantly, shift people’s attention from the medical device to her personality.

Materials You Actually Need (and What to Skip)
Some parents use vinyl wraps or paint for cranial helmet decoration ideas, but honestly, bows are the easiest DIY cranial helmet accessories. All you need are three simple things:
- Self-adhesive fastener dots (Velcro or “hook and loop” style)
- Bows with flat alligator clips
- Your baby’s cranial helmet (works for DocBand, Starband, or other brands)
That’s it. Less than $10 and you’re set.
What to Skip (Learn From My Mistakes)
When I first started, I tried a few other methods — and learned the hard way:
- Glue dots: too weak, they popped right off.
- Craft glue: messy, didn’t hold, and I worried about fumes.
- Heavy bows: Lily looked adorable, but they kept sliding off.
So trust me, stick with self-adhesive Velcro dots and lightweight bows. They’re safe, durable, and you can swap them out daily without leaving sticky residue behind.
Instructions to Attach a Bow to a Cranial Helmet:
Step 1: Prep the Helmet Like a Pro
Before you even think about sticking on bows, you’ll want to give the helmet a quick clean. Whether your baby has a DocBand, Starband, or another cranial band, this step is the same. Self-adhesive dots won’t stick if there’s any oil, dust, or leftover lotion on the surface.
The easiest way?
- Use an alcohol swab (or a cotton pad with rubbing alcohol).
- Wipe the area where you’ll place the bow.
- Let it dry completely before moving on.
I learned this the hard way — the very first bow I stuck on fell off before we even made it out the door. 🤦♀️ A simple wipe-down keeps the dots strong for weeks instead of hours.

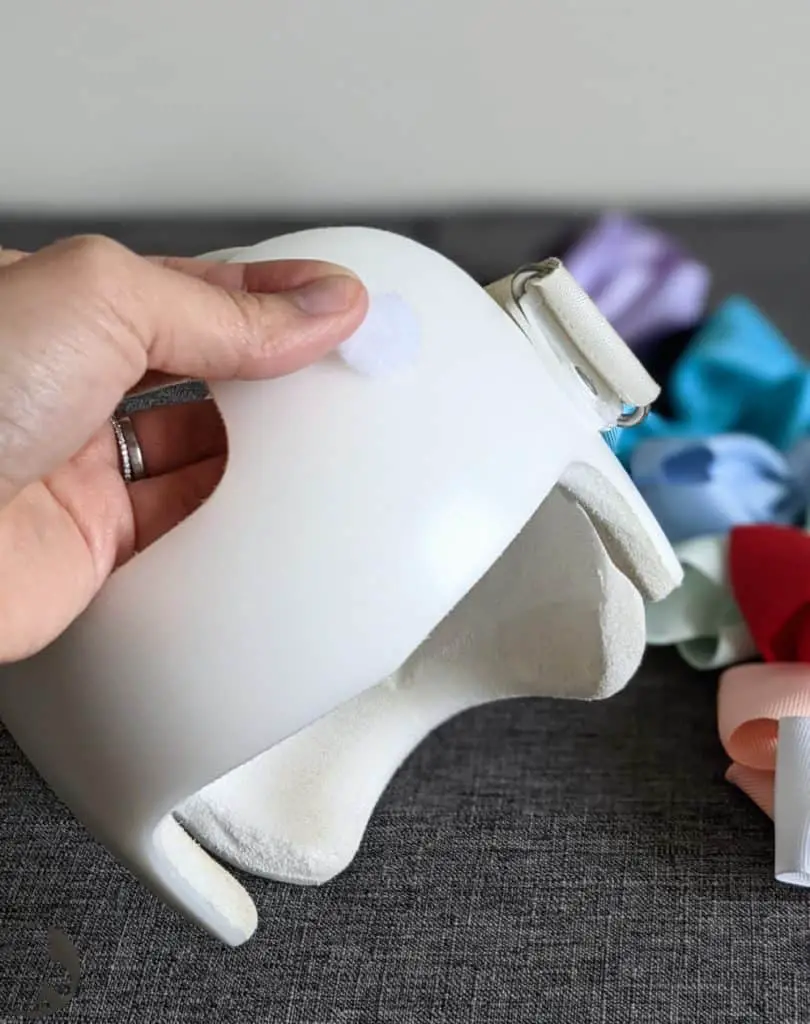
Step 2: Attach the Dot Without the Fuss
Now it’s time to stick the Velcro onto the helmet. You’ll want to attach just one side of the Velcro pair directly to the helmet.
Here’s my best tip:
- Put the loop (soft) side on the helmet.
- Save the hook (scratchy) side for the bows.
Why? Two reasons that only a fellow helmet mom would know:
- If your little one goes without a bow for a bit, the loop side won’t catch lint, fuzz, or stray hairs.
- When you snuggle your baby, the soft side won’t scratch your face (learned that one the hard way during cuddle time with Lily).
Press the dot down firmly for a few seconds, and you’re ready for bows.
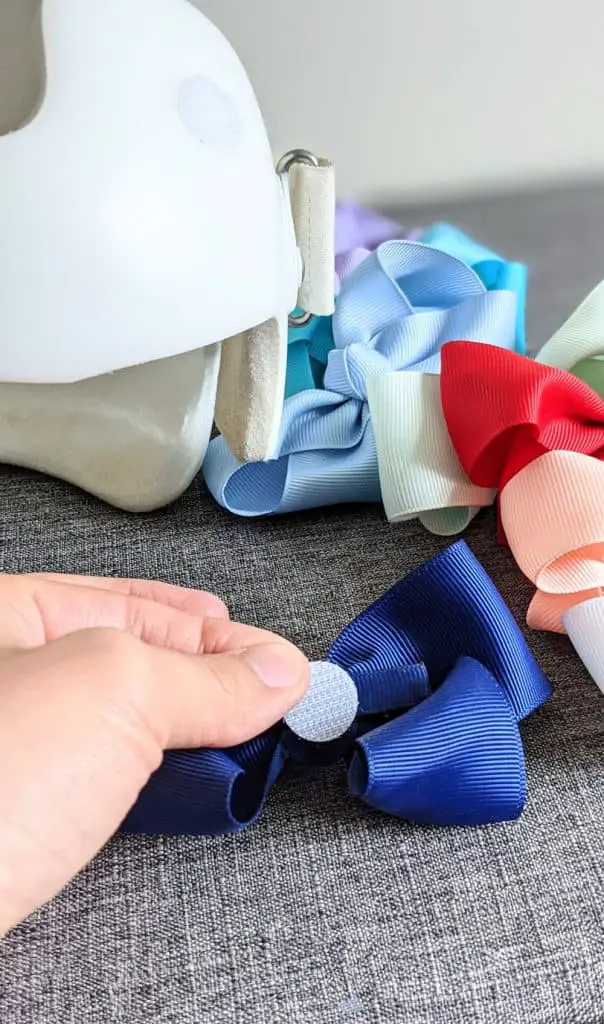
Step 3: Stick Dots to Bows (the Right Way)
Now let’s get those bows ready! Take the other side of each Velcro pair (the hook, scratchy side) and attach it to the back of the bow.
A few tips from trial and error:
- Choose bows with alligator clips — the flat metal gives the Velcro something solid to grip.
- Skip rounded or bulky clips — they don’t sit flush and fall off faster.
- Keep it lightweight — Flat bows with alligator clips are the best choice for baby helmet bows. Heavy cranial band bows just don’t stay put.
Press each Velcro piece down firmly for a few seconds. You’ll end up with a little “collection” of bows ready to swap out whenever you want.
Pro mom tip: If you order in bulk (I grabbed a 40-pack on Amazon 🙋♀️), prep them all at once while you binge-watch a show. You’ll thank yourself later when you have a bow for every outfit.
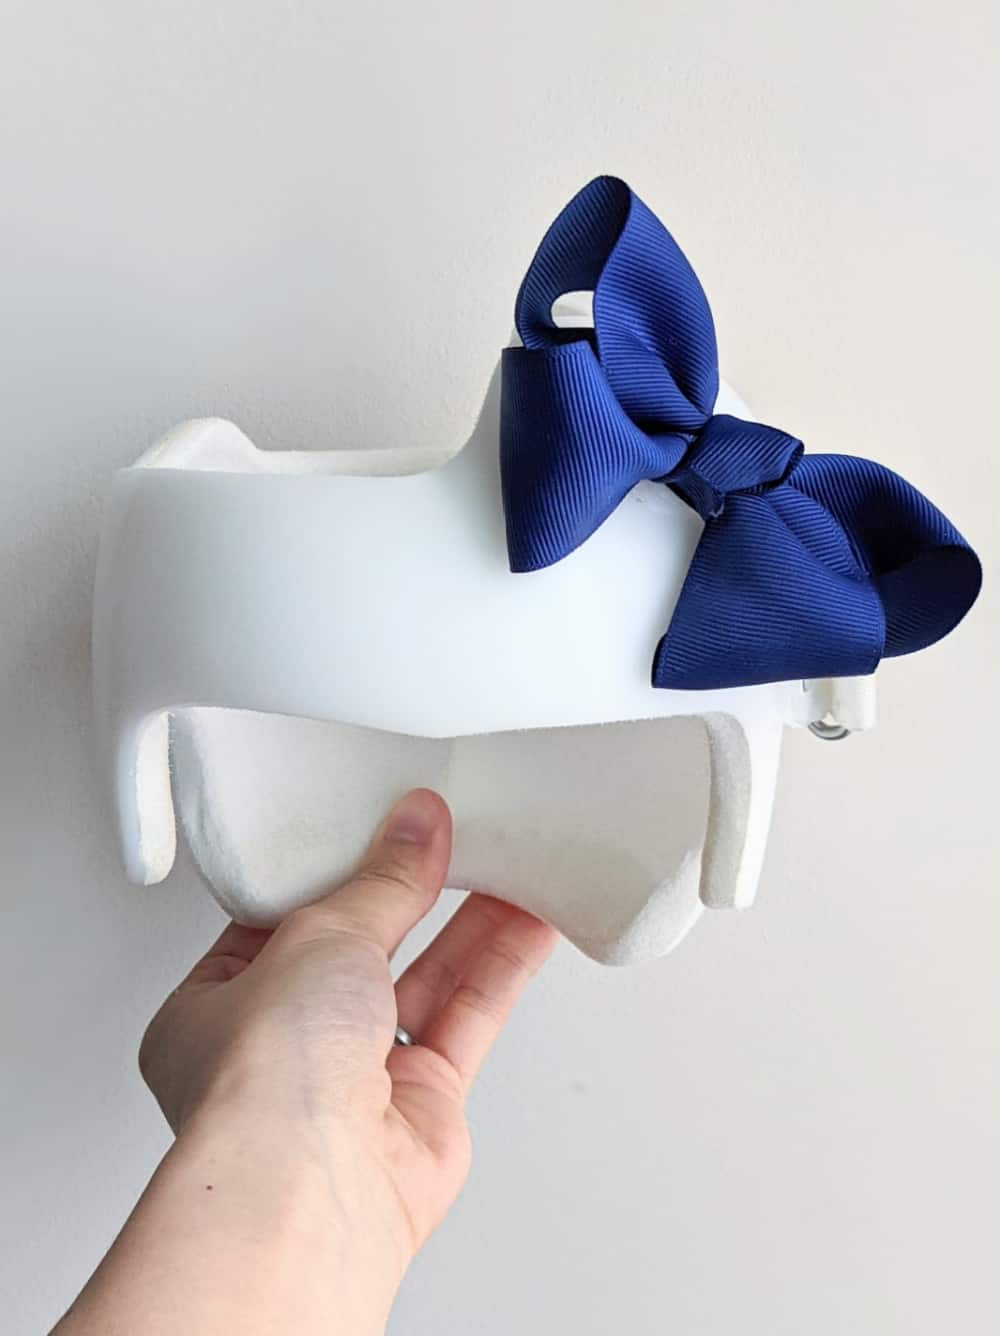
Step 4: Keep Bows On (Even if Baby Pulls Them Off)
Once the Velcro is in place, attaching and removing bows is super simple — just press the bow onto the helmet’s dot and peel it off when you’re ready to swap.
But let’s be real: if your baby is in the “grabby hands” stage, she might try to pull them off. Lily went through a phase where she wanted to rip everything in sight — toys, headbands, and yes, helmet bows.
Here’s what worked for us:
- Stick with the smaller bows — less to grab.
- Press firmly when attaching so the Velcro really locks in.
- Keep extras handy — if one comes off, it’s easy to replace on the spot.
These baby helmet decoration tips helped us survive Lily’s grabby-hands phase. Even when Lily managed to pop a few off, it didn’t hurt the helmet or the bow. I just stuck on a fresh dot and we were good as new.

What to Do With the Bows After Helmet Graduation
The helmet days don’t last forever (though they can feel like it when you’re cleaning Velcro dots every week 😅). Once your little one graduates, you might wonder: what do I do with all these bows?
Good news — they’re not a waste. Just peel off the Velcro dots and you’ve got regular hair bows again.
That is… if your baby has hair. We’re still waiting for Lily’s to grow in, so for a while those bows were just living their best life in a drawer. 🤣
Either way, the bows don’t go to waste. They’ll eventually get a second life in ponytails, pigtails, or even as outfit accessories. Think of it as your starter set for a lifetime of cute cranial helmet ideas turned into hair bows later on.

FAQs About Attaching Bows to Cranial Helmets
Turning Helmets Into Happiness
Decorating your baby’s cranial helmet isn’t just about looks — it’s about confidence. For you, as a parent, it takes away some of the worry about stares or judgment. And with a handful of baby helmet bows, you’ve turned a plain medical device into something fun and full of personality.
With just a few Velcro dots and bows, you’ve got a simple, affordable way to make every outfit (and every photo) extra cute. More importantly, you’ve found a way to celebrate this short season of helmet life, instead of hiding it.
I’d love to see how you decorate your baby’s helmet! Drop a comment below or tag me on Instagram @adailydoseofmom so I can cheer you on. 💕