Free Virtual Gallery Wall Layout Designer with Template
Are you looking for a new way to spruce up your home decor? Why not do a gallery wall?
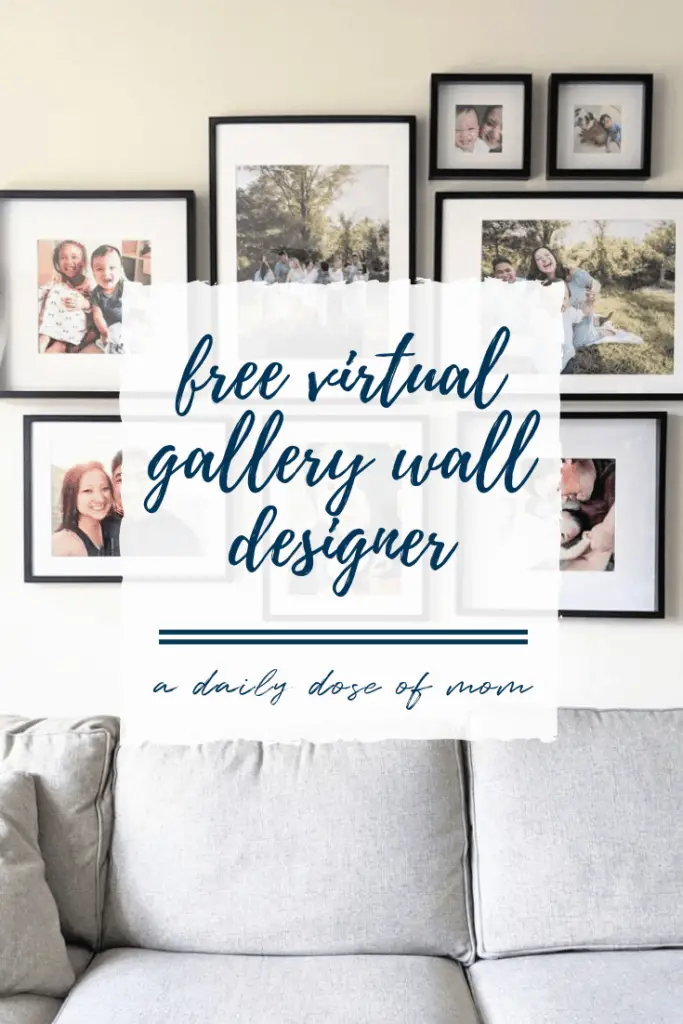
A gallery wall is a great option to display your treasured photos, mementos, and family portraits. We recently added a dream gallery wall to our living room to display family and travel photos. We love how much personality and visual interest it adds to our home. Whether you add a gallery wall to the dining room or a bedroom, it adds a focal point to your wall.
When planning the layout of the wall, there are many options on how to do so. Of course, you can always use an interior designer. Or you can make it a DIY project. You can use painter’s tape to outline your frames onto your own wall or you can lay your frames on the floor and reorganize them that way.
However, with all the technology available, I went all digital! And let me tell you – it’s such an easy and great way to visualize your layout and pictures! AND no dealing with measuring tape or paper templates!
In this post, I’ll show you how to do your own virtual gallery wall design and give you access to my FREE template!
This post contains affiliate links, which means I receive a small commission, at no extra cost to you, if you make a purchase using this link. Please see my disclosure for more details.
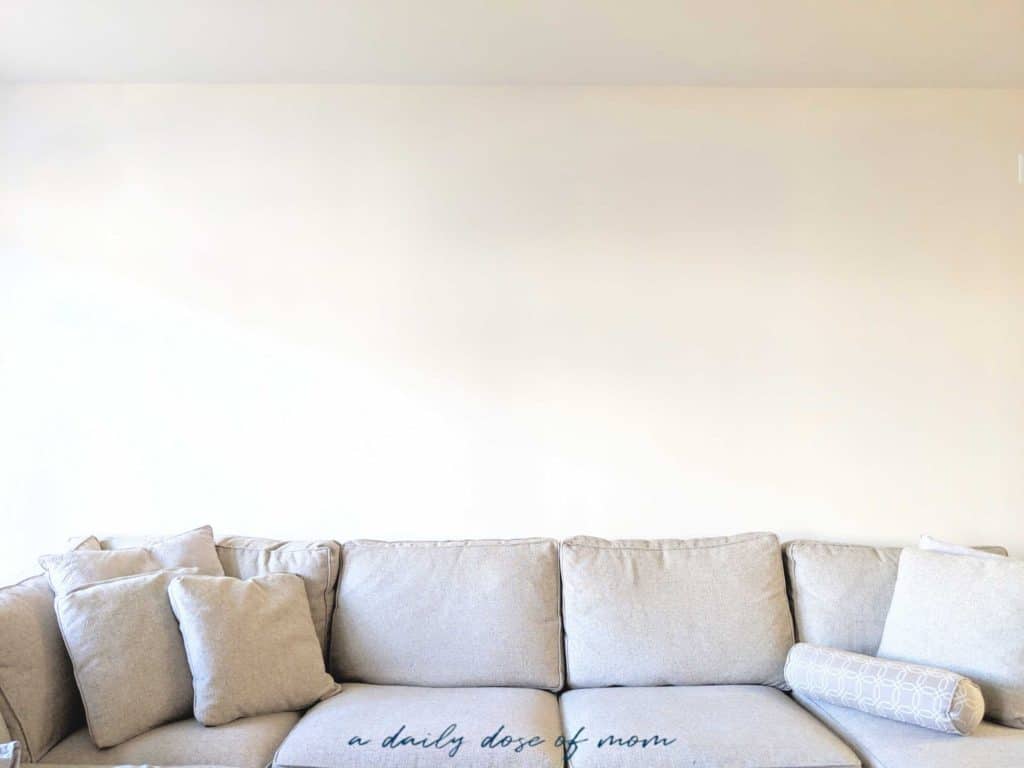
1. Take a photo of the space where you want your gallery wall
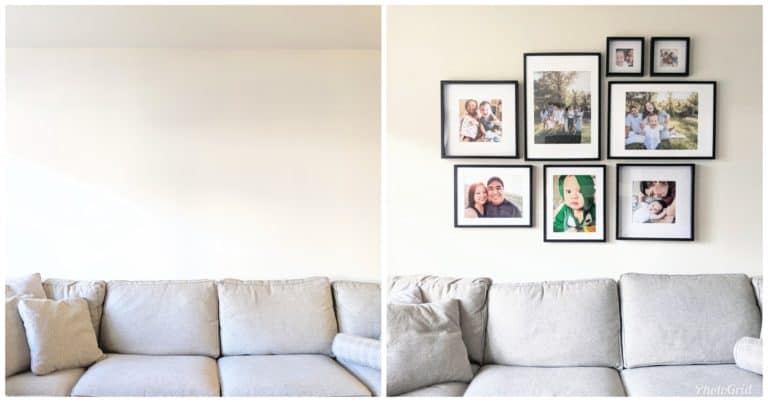
The first step is to a photo of the wall space where you want to place your gallery wall. A good starting point is a large wall with tons of negative space. This could include the wall behind a couch (like ours), above a bed, or the wall of a staircase.
When taking the photo, be sure to capture the whole wall. Include a little of the ceiling and anything else that is on the wall or nearby. This way, you can look at the spacing to see how different frames or different sizes will look with a certain piece of furniture. A photo that captures the whole space will also help you center your photo wall.
2. Use Canva to design your wall
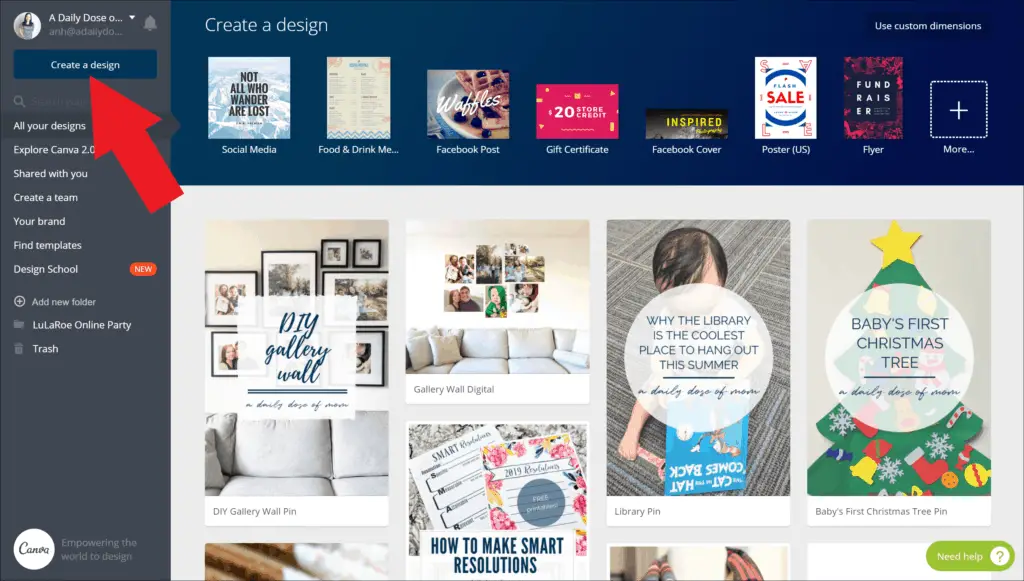
In the next step, you want to Go to canva.com or the Canva app. This free app is an easy way to achieve a perfect gallery wall layout. You’ll need to sign up for an account (if you don’t have one already), but the good news is that it’s free!
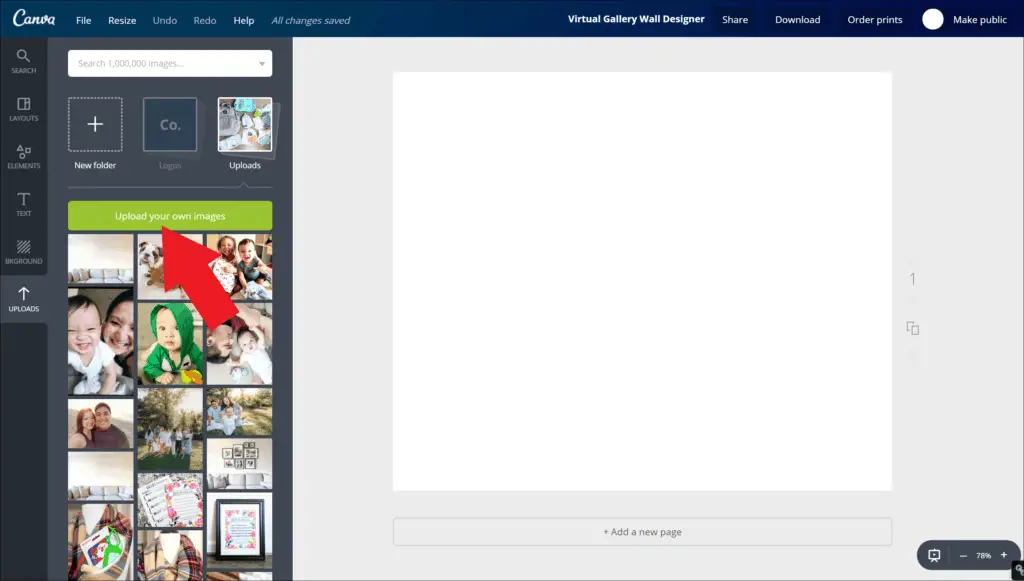
Click “Create a Design”. Choose a canvas that best matches your photo, either landscape or portrait. Then upload your photo of the blank wall and drag it to the blank design.
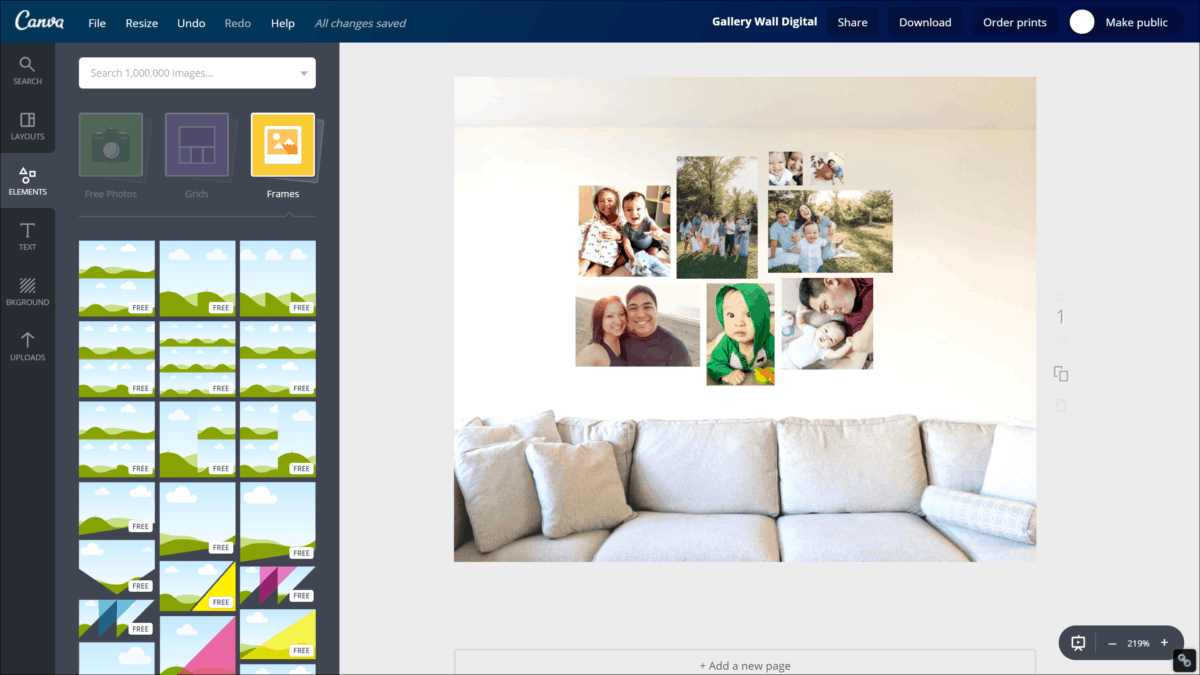
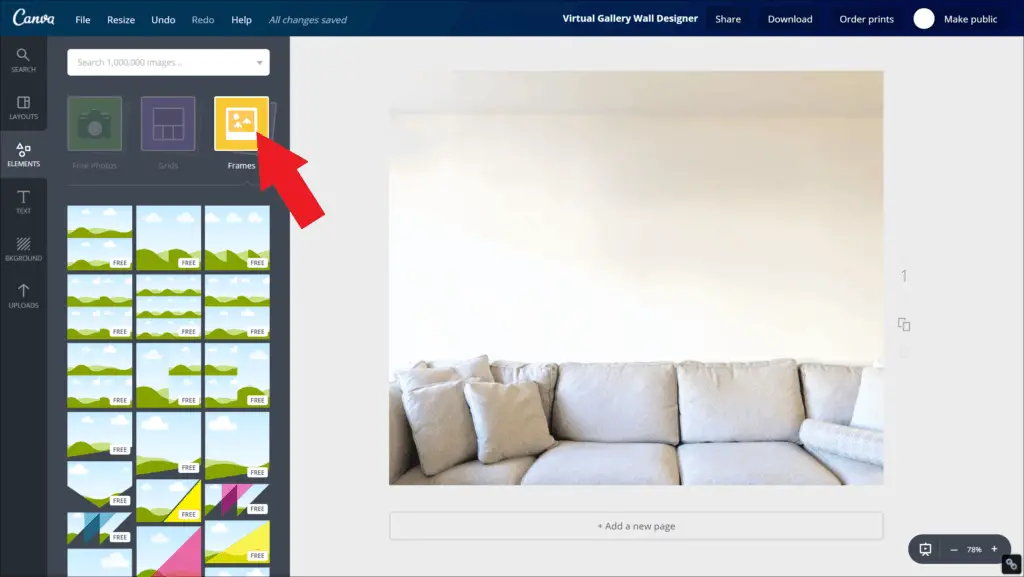
3. Add in picture frames
Once you have your blank wall uploaded, it’s time to add in your picture frames so you can play around with the layout and find the perfect place for each photo! You’ll be able to play around with different layouts to achieve a cohesive look. Once you’re done, you’ll have a final layout of your gallery wall.
To do this, click “Elements” on the left-hand panel. Then click “Frames”. Add the frames that match the orientation of your photos and resize them to get a general idea of the frames you’ll be adding to your actual wall. Unfortunately, you really can’t make the frames true to scale, but you can get a general idea of orientation and relative size. For example, you can make squares or rectangles to represent 9×9 vs. 8×10, respectively. Still, this is better than having to deal with a tape measure!
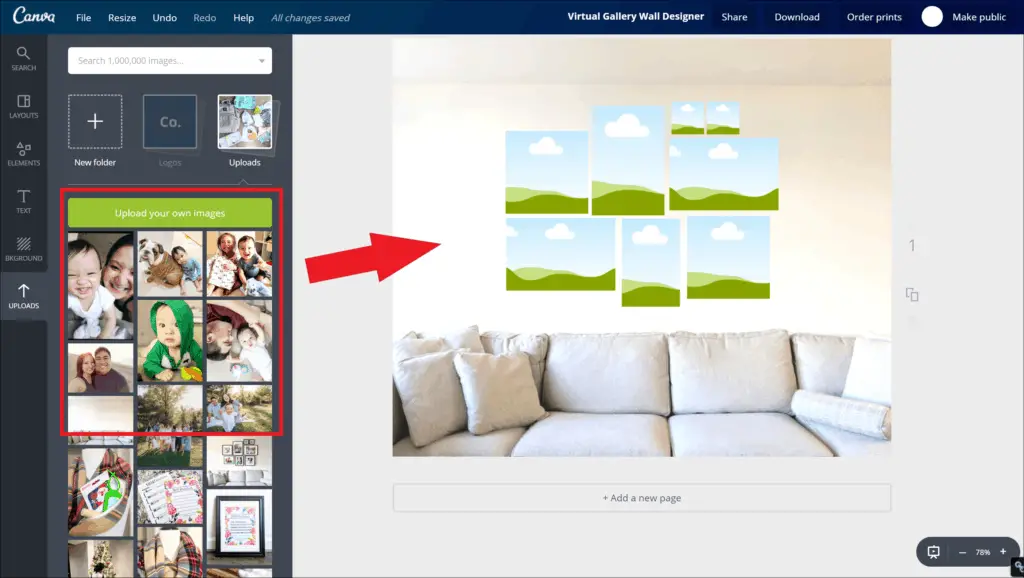
4. Upload your actual photos to the virtual frames
By now, you should have an idea of the photos and items that will make up your gallery wall and if they are all in the right place. Now it’s time to figure out the layout. Do you like these two photos together? Would maybe this photo look better? The good news about this virtual gallery wall designer is that you can move around the frames over and over again without breaking a sweat! Then, once you have the best layout, you can hit “Download” on the top right and you’re done!
FAQs about the Virtual Gallery Wall Designer
Download Your Gallery Wall Designer Template
With this virtual template for designing a gallery wall, there’s no need to deal with stubborn painter’s tape to outline frames on the wall. Or deal with frames on the floor as you gingerly step around them to change up a layout while trying to picture them hung up.
Having this virtual gallery wall designer through Canva is the easiest way to plan your own unique layout. Once you have your layout, it’s time to gather all of your materials, such as frames and photo prints. Because you did the layout, you already have a general idea of frame sizes and how many you need to get of each. For our gallery wall, we used black frames of various sizes.
Follow the rest of the step-by-step instructions on how to finish your DIY gallery wall! I can’t wait to see it!

To help get you started with your virtual gallery wall designer, here is my FREE template for you to play around with!